Easy Free Crochet Pumpkin Pattern: Sizes
Free crochet pumpkin patterns are the perfect solution to that little itch we all get when autumn rolls around – the one that whispers, “My shelves look a little bare, and my entryway needs a cozy touch!” You know the feeling, right? That slight unease when you look around and see blank surfaces that could be so much warmer, so much more inviting. Well, imagine adorning your home with adorable, handmade pumpkins in three delightful sizes. Picture them nestled on your mantelpiece, clustered on your coffee table, or even greeting guests on your porch. This little project can cost you next to nothing if you already have yarn scraps, and you can likely whip up a whole collection in just a couple of hours. I’ll guide you through each stitch, so whether you’re a seasoned crocheter or just starting out, you’ll learn how to create these charming decorations with ease.
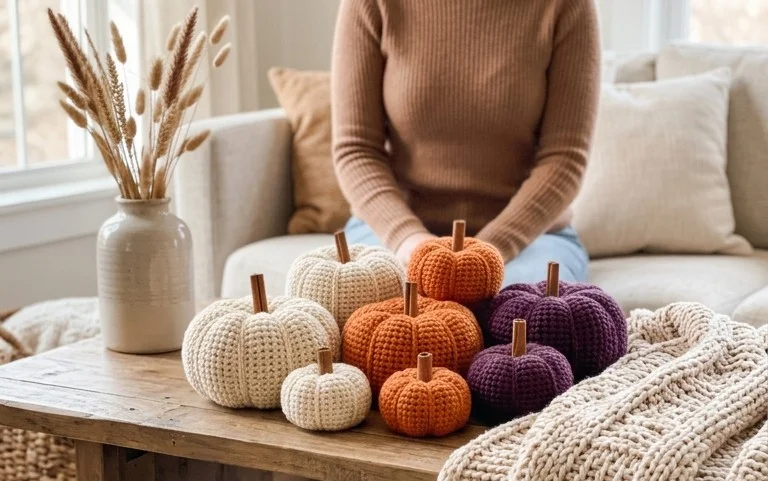
Craft Your Cozy Corner: A Free Crochet Pumpkin Pattern in 3 Sizes
Autumn is my favorite season. There’s a certain magic in the air, a crispness that hints at cozy nights in and the beauty of changing leaves. And what better way to welcome this season into your home than with charming, handmade decor? Today, I’m so excited to share a free crochet pumpkin pattern that’s not only incredibly easy but also results in adorable decorations in three versatile sizes. These little gourds are perfect for adding a touch of rustic warmth to any space, and best of all, they’re completely customizable. Let’s dive in and create some autumnal magic together!
What You’ll Need and Roughly What It Costs
Gathering your supplies is the first exciting step. For this project, you’ll primarily need yarn and a crochet hook.
Yarn Selection
I recommend using a worsted-weight yarn for these pumpkins. This weight strikes a great balance between being easy to work with and creating a nice, plump shape. For a single pumpkin, you’ll need approximately 30-50 yards of yarn, depending on the size.
* **Color:** The classic pumpkin colors are, of course, shades of orange, but don’t be afraid to experiment! Deep reds, buttery yellows, creamy whites, and even muted greens can look stunning. For a smaller pumpkin, you might only need a small amount of yarn, making it a fantastic way to use up those lovely scraps you’ve accumulated.
* **Fiber:** Acrylic yarn is a budget-friendly and durable option that’s widely available. Wool or wool blends will give a more luxurious feel and a slightly heavier drape. Cotton is also a good choice for a more structured pumpkin.
* **Quantity:** For one medium-sized pumpkin, you’ll likely use around 40 yards. If you plan to make a set of three in different sizes, I’d suggest purchasing one skein (typically 100-200 yards) of your chosen color. This will be more than enough for all three and often leaves plenty for other small projects.
Crochet Hook
A good quality crochet hook is essential. For worsted-weight yarn, a size H/8 (5.0 mm) hook is a great starting point. The exact hook size can vary slightly depending on your yarn and your personal crocheting tension. I usually find a 5.0 mm or 5.5 mm hook works best.
Other Essentials
* **Yarn Needle:** You’ll need this for weaving in ends.
* **Scissors:** For cutting yarn.
* **Stitch Marker (Optional but Recommended):** This is incredibly helpful for keeping track of your rounds.
* **Stuffing:** Polyester fiberfill is readily available and works perfectly. You can also use scraps of yarn, old fabric, or even rice (for a weighted, stable pumpkin).
Rough Cost Estimation
Let’s break down the potential costs:
* **Yarn:** A standard skein of acrylic worsted-weight yarn can range from $4 to $8. If you buy one skein for multiple pumpkins, the cost per pumpkin is very low, around $1-$2.
* **Crochet Hook:** If you don’t already own one, a basic hook can cost $2-$5.
* **Stuffing:** A bag of polyester fiberfill, which will last you for many projects, is usually around $5-$10.
So, for a single pumpkin, your total cost is likely to be between $2 and $6, depending on what you already have in your stash. Making a set of three will cost a little more for the yarn, but still be incredibly affordable at roughly $5-$15.
Measuring and Planning Before You Start
Before you even pick up your hook, a little planning goes a long way.
Understanding the Sizes
This pattern is designed for three sizes, which I’ll call Small, Medium, and Large. The beauty of crochet is its flexibility, but here’s a general idea of what these sizes will achieve:
* **Small Pumpkin:** Roughly 3-4 inches in diameter when laid flat. Perfect for a windowsill or to group together on a tray.
* **Medium Pumpkin:** Approximately 5-6 inches in diameter when laid flat. A lovely size for a mantelpiece or coffee table.
* **Large Pumpkin:** Around 7-8 inches in diameter when laid flat. Makes a statement piece!
Gauge Swatching (Optional but Good Practice)
While for decorative items like this, perfect gauge isn’t as critical as for garments, a quick swatch can help you achieve the desired size. Make a small square (about 4×4 inches) using the main stitch of the pattern (which we’ll get to) and your chosen hook and yarn. Measure it. If your swatch is larger than expected, try a smaller hook. If it’s smaller, try a larger hook. This will ensure your finished pumpkins are close to the target dimensions.
Choosing Your Stem Material
The stem adds so much character! You have a few options:
* **Crocheted Stem:** This is what the pattern will focus on. It’s easy and uses up even more scrap yarn.
* **Real Stick/Twig:** For a more natural look, find a small, interesting twig from your garden or a nature walk. Ensure it’s clean and dry.
* **Wooden Dowel:** Cut a small piece of a wooden dowel and perhaps paint it brown.
Your Step-by-Step Crochet Pumpkin Journey
This pattern relies on a very simple stitch that creates a lovely, textured fabric. We’ll be working in continuous rounds, so a stitch marker is a lifesaver!
The Basic Construction: The Magic Ring and Single Crochet Rounds
The foundation of our pumpkin is a magic ring (also called a magic circle), which creates a tight, hole-free center. From there, we’ll work rounds of single crochet (sc) stitches, increasing evenly to create a rounded shape.
1. **Start with a Magic Ring:** Create a loop of yarn. Insert your hook into the loop, yarn over, and pull up a loop. Chain 1 (this doesn’t count as a stitch).
2. **Round 1:** Single crochet 6 (sc 6) stitches into the magic ring. Pull the tail to tighten the ring. Place your stitch marker in the last stitch of this round. (6 stitches)
3. **Round 2:** Work 2 single crochet stitches in each stitch around. (12 stitches)
4. **Round 3:** *Work 1 single crochet in the next stitch, then work 2 single crochet stitches in the following stitch.* Repeat from * to * around. (18 stitches)
5. **Round 4:** *Work 1 single crochet in the next 2 stitches, then work 2 single crochet stitches in the following stitch.* Repeat from * to * around. (24 stitches)
6. **Round 5:** *Work 1 single crochet in the next 3 stitches, then work 2 single crochet stitches in the following stitch.* Repeat from * to * around. (30 stitches)
This is the basic increase pattern. To make your pumpkins different sizes, you’ll simply continue this pattern for more rounds, adding one more single crochet between increases each round.
* **For the Small Pumpkin:** Stop after Round 5.
* **For the Medium Pumpkin:** Continue to Round 6: *Work 1 single crochet in the next 4 stitches, then work 2 single crochet stitches in the following stitch.* Repeat from * to * around. (36 stitches). Stop after Round 6.
* **For the Large Pumpkin:** Continue to Round 7: *Work 1 single crochet in the next 5 stitches, then work 2 single crochet stitches in the following stitch.* Repeat from * to * around. (42 stitches). Stop after Round 7.
You now have the basic body of your pumpkin!
Creating the Shape: Working Even Rounds
After your last increase round, you’ll work several rounds of single crochet in each stitch around without any increases. This is what will create the plump, spherical shape.
1. **Next Round (and subsequent rounds):** Work 1 single crochet in each stitch around. Move your stitch marker up to the last stitch of each round.
* **Small Pumpkin:** Work 4-5 rounds even.
* **Medium Pumpkin:** Work 6-7 rounds even.
* **Large Pumpkin:** Work 8-10 rounds even.
The number of even rounds is flexible and depends on how tall and plump you want your pumpkin to be. Don’t be afraid to try a different number of rounds; it’s all part of the creative process!
Finishing the Body: Decreasing for Closure
Now we’ll work decrease rounds to close up the top of the pumpkin.
1. **Decrease Round 1:** *Work 1 single crochet in the next 5 stitches, then work a single crochet 2 together (sc2tog).* Repeat from * to * around. (Approximately 36 stitches remaining, depending on your pumpkin size)
2. **Decrease Round 2:** *Work 1 single crochet in the next 4 stitches, then work a sc2tog.* Repeat from * to * around. (Approximately 30 stitches remaining)
3. **Decrease Round 3:** *Work 1 single crochet in the next 3 stitches, then work a sc2tog.* Repeat from * to * around. (Approximately 24 stitches remaining)
4. **Decrease Round 4:** *Work 1 single crochet in the next 2 stitches, then work a sc2tog.* Repeat from * to * around. (Approximately 18 stitches remaining)
5. **Decrease Round 5:** *Work 1 single crochet in the next stitch, then work a sc2tog.* Repeat from * to * around. (Approximately 12 stitches remaining)
Stuffing Your Pumpkin
Before you close it completely, it’s time to add the stuffing!
1. Generously stuff the pumpkin, making sure to push stuffing into all the nooks and crannies. You want it to be firm but not so stuffed that it distorts the stitches. The firmer it is, the better it will hold its shape.
### Closing and Creating the Pumpkin Lines
1. **Final Decrease Round:** *Work a sc2tog* around. (Approximately 6 stitches remaining)
2. Cut your yarn, leaving a tail of about 6 inches. Thread this tail onto your yarn needle.
3. Weave the needle in and out through the remaining stitches on your hook, pulling it snug as you go. Pull the tail firmly to close the opening completely. Fasten off and weave in your yarn end securely.
### Crafting the Stem
This is a super quick and easy stem!
1. **Magic Ring:** Create a magic ring. Chain 1.
2. **Round 1:** Work 4 single crochet stitches into the magic ring. Pull tail to tighten. (4 stitches)
3. **Round 2:** Work 1 single crochet in each stitch around. (4 stitches)
4. **Round 3:** *Work 2 single crochet stitches in the first stitch, 1 single crochet in the next 2 stitches.* Repeat from * to * around. (6 stitches)
5. **Rounds 4-5:** Work 1 single crochet in each stitch around. (6 stitches)
6. Fasten off, leaving a long tail for sewing. Stuff the stem lightly.
### Assembling Your Pumpkin
1. Thread the stem’s yarn tail onto your yarn needle.
2. Position the stem on the top center of your pumpkin.
3. Sew the stem securely to the pumpkin, weaving the needle through the base of the stem and into the pumpkin body.
4. To create the classic pumpkin lines, thread your yarn needle with a long piece of yarn (about 18 inches). Insert the needle from the bottom center of the pumpkin, bring it up through the top center (where the stem is attached), and then back down through the bottom center, exiting the same spot you started. Pull gently to create a slight indentation. Repeat this process several times, spacing the lines evenly around the pumpkin. Aim for 4-6 lines depending on the size of your pumpkin. This gives it that signature ribbed look!
5. Weave in all yarn ends securely.
Styling Your Crocheted Pumpkins
Now for the fun part – making your creations look fabulous in your home!
Color Coordination
* **Traditional Palette:** Stick to classic oranges, yellows, and browns for a quintessential fall feel.
* **Modern Twist:** Explore muted tones like cream, dusty rose, sage green, or even deep charcoal. These can blend beautifully with contemporary decor.
* **Monochromatic Magic:** A grouping of pumpkins all in varying shades of the same color can be incredibly chic and sophisticated.
Texture Play
These crocheted pumpkins add wonderful texture on their own. Combine them with other natural textures for a layered look:
* **Against Wood:** Place them on wooden trays, shelves, or against wooden signs.
* **With Natural Elements:** Pair them with pinecones, dried leaves, acorns, or cinnamon sticks.
* **On Fabric:** Drape them over cozy blankets, place them on burlap runners, or nestle them among faux fur throws.
Placement Strategies
* **Entryway Welcome:** Place a medium or large pumpkin on your console table or a shelf by the door.
* **Mantelpiece Magic:** Arrange a collection of the three sizes on your mantelpiece. Mix in candles, greenery, or small seasonal figurines.
* **Coffee Table Centerpiece:** A few pumpkins clustered on a coffee table, perhaps with a few pillar candles, create an inviting focal point.
* **Shelf Decor:** Dot small pumpkins along bookshelves or on side tables.
* **Rental-Friendly Vignettes:** For those who can’t drill or make permanent changes, these pumpkins are perfect! Arrange them on existing furniture, windowsills, or even on the floor in a cozy corner. Use decorative baskets or trays to define your display areas.
## Keeping Them Tidy After Week One
The beauty of these crochet pumpkins is that they require very little upkeep. However, to keep them looking their best:
* **Dusting:** A gentle dusting with a soft cloth or a feather duster should be sufficient. If you have a particularly dusty environment, you can use a slightly damp (not wet) cloth.
* **Reshaping:** If your pumpkins get a bit squished, simply give them a gentle reshape with your hands. The stuffing should allow them to bounce back.
* **Pet and Child Friendly:** While they are fabric, they are generally quite durable. If they do get a small snag, you can often gently weave the yarn back in with a needle.
## Common Mistakes That Make These Pumpkins Fail
Even with a simple pattern, a few common pitfalls can detract from your finished project.
* **Not Stuffing Enough:** This is the most common mistake! An under-stuffed pumpkin will look deflated and won’t hold its shape well. Be generous with the stuffing, especially in the earlier stages of filling.
* **Not Tightening the Magic Ring:** If you don’t pull the starting tail tight, you’ll have a gaping hole in the bottom of your pumpkin, which is hard to close neatly.
* **Uneven Increases/Decreases:** This can lead to a lopsided or bumpy pumpkin. Try to keep your stitch count consistent in each increase or decrease round. Using a stitch marker helps tremendously here.
* **Skipping the “Lines”:** While optional, those threaded lines are what truly give the pumpkin its iconic shape. Skipping them will result in a more ball-like object, which is still cute, but not quite a pumpkin.
* **Using Too Large a Hook:** If your hook is too big for your yarn, your stitches will be loose, and the stuffing might show through. This can also make the pumpkin much larger than intended.
Don’t be discouraged if your first attempt isn’t perfect! Each stitch you make is practice, and soon you’ll be crocheting pumpkins like a pro. Enjoy the process of creating these charming little decorations that will bring warmth and handmade charm to your home all season long. Happy crocheting!
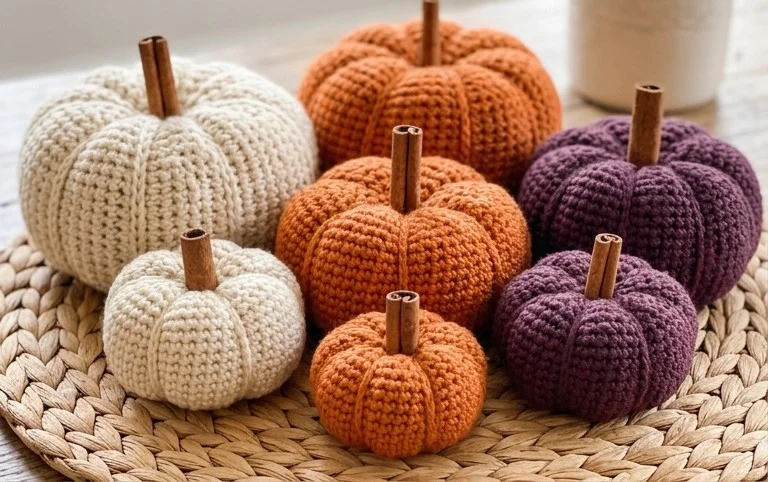
Conclusion
Isn’t it amazing how a few handmade touches can transform a space and brighten your everyday? These charming crochet pumpkins, made with our free pattern in 3 sizes, are the perfect way to inject warmth and seasonal delight into your home. Imagine them gracing your mantelpiece, a cozy shelf, or even as a welcoming accent on your entryway table – they truly make a difference day to day.
Ready to start? Your smallest possible first step is to grab your yarn and hook and create just one small pumpkin. It’s a quick and satisfying project that will get you hooked! For a different feel, consider making a garland of mini pumpkins for a cheerful kitchen display, or a larger pumpkin in a neutral tone for a more sophisticated living room accent.
We hope these little gourds inspire your creativity! Don’t stop here; we have plenty more home decor and organization ideas waiting for you to explore.
