Easy Organized Portable Home Office Ideas
My Organized Portable Home Office is a game-changer, transforming that perpetually cluttered corner into a serene workspace. Does your dining table double as a filing cabinet, or your sofa a makeshift desk, leaving you feeling stressed and scattered before your day even begins? Imagine instead a dedicated, stylish nook that packs away neatly, reclaiming your living space. This isn’t a fantasy; it’s achievable in a weekend, for under $200! In this article, I’ll share my simple secrets to creating your own functional and beautiful portable office. You’ll learn how to select the right storage solutions, maximize vertical space, and implement smart organizational habits that stick. Get ready to feel calmer, more productive, and enjoy a tidier home, all thanks to your new organized portable office.
My Organized Portable Home Office
The dream of a dedicated home office is often dashed by the reality of limited space. For many of us, a spare room is a luxury we can’t afford. But what if I told you that you can create a fully functional, organized, and even stylish home office that you can pack away when not in use? Yes, you can have your cake and eat it too, reclaiming your living space and maintaining your productivity. I’ve been there, staring at a pile of papers on the dining table, feeling the guilt every time guests arrived. So, I embarked on a mission to create a portable home office that fits my life, and today I’m sharing my blueprint with you.
What You Need and Roughly What It Costs
The beauty of a portable office is its adaptability. You can scale it up or down, and the cost is entirely dependent on your choices. My setup prioritizes functionality and a touch of aesthetic appeal without breaking the bank.
Here’s a breakdown of the essentials:
* **A Compact Desk Solution:** I opted for a folding desk with a slim profile. Look for something around 30-36 inches wide and 18-24 inches deep when open. Many are designed for small spaces and fold flat for storage.
* *Rough Cost:* $80 – $200. I found a sturdy, foldable metal-frame desk for $120.
* **A Comfortable, Ergonomic Chair:** This is non-negotiable for long work sessions. If you don’t have a dedicated office chair, consider a supportive dining chair with a lumbar cushion.
* *Rough Cost:* $50 – $150 (for a basic but comfortable chair). If you’re using a dining chair, factor in $15 – $30 for a good cushion.
* **Smart Storage Solutions:** This is where the magic happens for portability and organization.
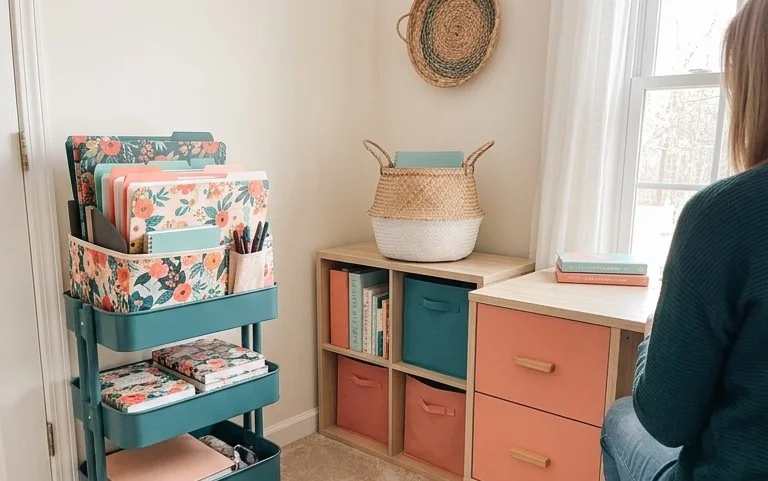
* **Stackable Bins or Drawer Units:** I use two small, clear, stackable drawer units (approx. 12″ W x 10″ D x 8″ H each) for stationery, cables, and small tech accessories.
* *Rough Cost:* $20 – $40 per unit. Mine were $25 each.
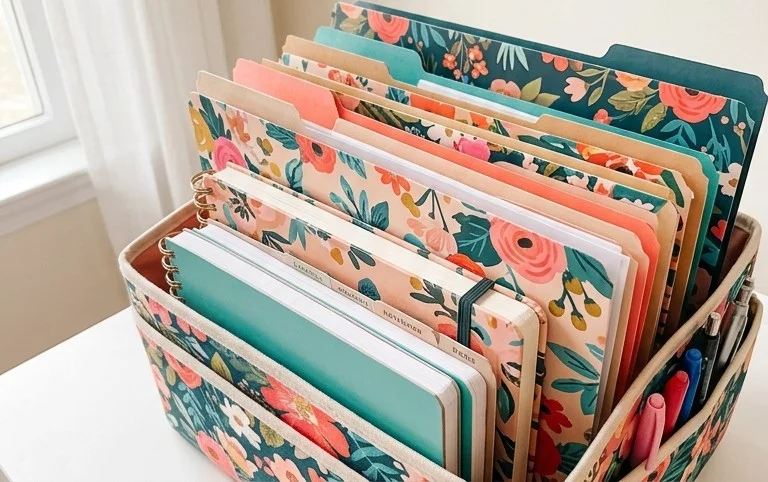
* **A Magazine Holder or File Sorter:** To keep important documents or current projects upright. Look for one that’s roughly 10-12 inches tall.
* *Rough Cost:* $10 – $25. I found a stylish metal magazine holder for $18.
* **Wall-Mounted Organizers (Rental-Friendly Options):** If drilling isn’t an option, consider over-the-door organizers, command strip hooks, or tension rod solutions. I use an over-the-door mesh pocket organizer (approx. 15″ W x 40″ L) for notebooks, pens, and smaller items.
* *Rough Cost:* $20 – $40. My over-the-door organizer was $35.
* **Cable Management:** Velcro ties, a cable sleeve, or a small cable organizer box.
* *Rough Cost:* $5 – $15. I used a pack of 10 velcro ties for $8.
* **Lighting:** A good task lamp is crucial. A clip-on or gooseneck lamp is ideal for portability and flexibility.
* *Rough Cost:* $20 – $50. I invested in a good LED gooseneck lamp for $30.
* **Laptop Stand (Optional but Recommended):** To bring your screen to eye level and improve ergonomics.
* *Rough Cost:* $15 – $30.
* **Decor and Personal Touches:** A small plant, a framed photo, a nice coaster.
* *Rough Cost:* $10 – $30.
**Total Estimated Cost (My Mid-Range Setup):** $300 – $600. This is a one-time investment, and you can find fantastic deals if you shop around or opt for more budget-friendly options.
How to Measure and Plan Before You Start
Before you buy a single thing, take out your tape measure. This is the most crucial step to ensure your portable office actually *fits* and functions.
1. **Identify Your Dedicated Space:** Where will this office live when it’s not in use? A corner of the living room? A closet? A bedroom?
2. **Measure the Footprint:** Measure the dimensions of the space where your desk will be when it’s open. Note the width, depth, and available height. Also, measure the space where it will be stored – consider its folded dimensions and the clearance around it.
3. **Assess Your Workflow:** What do you *actually* do when you work? Do you spread out papers? Do you need space for multiple monitors? List your essential items and how much space they typically occupy. This will inform your storage needs and desk size.
4. **Consider Power Outlets and Natural Light:** Position your desk near an outlet for your electronics. Think about window placement for natural light, which is great for mood and reducing eye strain.
5. **Visualize the Flow:** Imagine yourself sitting at the desk. Can you comfortably reach everything? Is there enough legroom? Can you easily access your storage?
For my setup, I measured the corner of my living room where I wanted to place the desk. I had a 3-foot wide by 2-foot deep space available when the desk was open. I also ensured there was enough clearance to walk past it, approximately 2.5 feet. When folded, the desk was 3 feet tall and only 4 inches deep, fitting neatly against a wall in my bedroom closet.
A Clear Numbered Walkthrough of the Process
Creating your portable home office is a straightforward process once you have a plan.
1. **Select Your Desk:** Based on your measurements and workflow, choose a foldable desk that fits your designated space. Ensure it’s stable when open and folds compactly.
2. **Assemble Your Storage:** Unpack and assemble your drawer units, magazine holders, and any other storage components.
3. **Arrange Storage Units:** Place your storage units in their designated spots. If using stackable bins, arrange them so they are easily accessible from your seated position. If using an over-the-door organizer, hang it on a sturdy door that’s conveniently located.
4. **Position the Desk:** Place the foldable desk in its working location. Open it up and check for stability.
5. **Set Up Your Chair:** Bring your chosen chair to the desk and ensure it offers comfortable seating.
6. **Install Lighting:** Position your task lamp. If it’s a clip-on, attach it to the desk or a nearby shelf. If it’s a gooseneck, place it where it can illuminate your workspace effectively.
7. **Organize Your Essentials:** This is where the real magic happens.
* Load your drawer units with stationery, cables, chargers, pens, and any small tech accessories. Label the drawers if it helps you.
* Place current projects, notebooks, or important documents in your magazine holder.
* Utilize the pockets of your over-the-door organizer for items you need quick access to, like your phone, a notepad, or a small water bottle.
8. **Manage Your Cables:** Use velcro ties or a cable sleeve to bundle your laptop and monitor (if applicable) cords. This keeps them neat and prevents them from becoming a tangled mess.
9. **Add Personal Touches:** Bring in your small plant, a framed photo, or anything else that makes the space feel yours and inspiring.
10. **Test Drive and Adjust:** Sit down at your new workstation. Work for a bit. Is everything within reach? Is the lighting adequate? Make small adjustments as needed.
How to Adapt It for a Small Space or a Rental Where You Cannot Drill
This is where creativity truly shines! My portable office is born from necessity, and I’ve made it work in various living situations.
* **For Small Spaces:**
* **Verticality is Key:** Maximize wall space. Utilize tall, slim bookshelves that can double as storage for binders and decorative items. Wall-mounted shelves (using strong adhesive strips if drilling is prohibited) can hold your task lamp, small plants, or even a small monitor.
* **Multipurpose Furniture:** If your desk has built-in shelves or drawers, fantastic. Even your coffee table can become a temporary desk if it’s the right height and you have a good lap desk.
* **Consider a Wall-Mounted Fold-Down Desk:** These are ingenious for tiny spaces. They are literally a desk that folds into the wall when not in use.
* **For Rentals (No Drilling):**
* **Command Strips are Your Best Friend:** For hanging lightweight items like your magazine holder, cable organizers, or even small shelves. Test them on an inconspicuous spot first to ensure they don’t damage paint.
* **Tension Rods:** Use tension rods in doorways or along walls to hang fabric organizers, clipboards, or even create a makeshift privacy screen.
* **Over-the-Door Organizers:** As mentioned, these are a lifesaver for maximizing space without any attachment.
* **Freestanding Storage Units:** Opt for small, mobile drawer units or shelving units that can be easily moved and don’t require installation.
* **Floor Cushions or Poufs:** If space is extremely tight for a chair, a comfortable floor cushion can suffice for shorter work periods, combined with a lap desk.
Styling Notes: Colour, Texture, and Placement
An organized space shouldn’t feel sterile. It should feel inviting and conducive to focus.
* **Colour Palette:** I lean towards a calming and neutral palette for my workspace. Think whites, soft greys, natural wood tones, and subtle pops of colour from accessories. This helps to create a sense of peace and reduces visual distraction. My desk has a light wood finish, my storage bins are clear, and my magazine holder is a matte black metal. My task lamp is brushed nickel.
* **Texture:** Introduce elements of texture to add warmth and interest. A woven storage basket for larger items (like extra notebooks), a fabric mousepad, or even a small, soft rug under your chair can make a big difference. My over-the-door organizer is a textured mesh, and I have a small faux succulent in a ceramic pot.
* **What to Put Where (So It Still Looks Good Once In Use):**
* **Desk Surface:** Keep it as clear as possible. Your laptop, a notebook, a pen, and your task lamp. Anything else should have its designated spot in a drawer or organizer. This is crucial for that “ready to pack away” aesthetic.
* **Within Reach:** The items you use most frequently should be in your immediate vicinity. Pens, a notepad, your phone, and perhaps your water bottle. My magazine holder sits on the desk, and my favourite pen is in a small pot.
* **Secondary Storage:** Items you use less often can be in the drawers or the over-the-door organizer. This includes spare chargers, envelopes, stapler, etc.
* **Decorative Elements:** These are your personal touches. A small plant on the desk or a framed photo on a nearby shelf adds personality without clutter. These are the last things to be put away when you pack up.
* **Cable Management is Styling:** Neatly managed cables contribute significantly to a polished look.
## How to Keep It Tidy After Week One
The initial thrill of a new organized space can wane. Here’s how to maintain your portable office’s tidiness:
* **The Five-Minute Tidy:** At the end of each workday, dedicate just five minutes to putting things back where they belong. Close drawers, put pens in their holder, and clear the desk surface. This prevents small messes from accumulating.
* **”One In, One Out” Rule:** For new stationery or supplies, consider if you can discard an old item. This prevents an overflow of materials.
* **Weekly Sweep:** Once a week, take a slightly deeper dive. File away any loose papers, wipe down the desk surface, and ensure all items are neatly in their designated spots.
* **Regular Decluttering:** Every month or two, go through your storage bins and organizers. Discard anything you no longer need or use. Be ruthless!
* **Designated “Landing Zone”:** Have a specific spot for items that are in transit – mail that needs sorting, documents to be filed. This prevents them from migrating all over your home.
## The Mistakes That Make This Fail
Even the best intentions can go awry. Here are common pitfalls to avoid:
* **Underestimating Space Needs:** Not accurately measuring your available space, both for working and for storage. This leads to a desk that’s too big, or storage that doesn’t fit.
* **Over-Buying Storage:** Thinking more is always better. It’s easy to fill every available container, leading to visual clutter and making the “portable” aspect of your office more cumbersome. Focus on *essential* storage.
* **Ignoring Ergonomics:** Choosing a desk or chair that looks good but is uncomfortable. You’ll dread working there, and it can lead to physical discomfort.
* **Poor Cable Management:** Letting cords become a tangled mess is not only unsightly but also a tripping hazard and can damage your electronics.
* **Not Having a Dedicated “Pack Away” Routine:** If you don’t have a consistent habit of folding your desk and storing your items, it will quickly become a permanent fixture, defeating the purpose.
* **Letting Papers Pile Up:** This is the arch-nemesis of any organized space. Implement a filing system, even a simple one, to deal with papers as they arrive.
* **Neglecting Maintenance:** Assuming that once it’s organized, it will stay that way. Regular, small bursts of tidying are far more effective than marathon decluttering sessions.
* **Ignoring the “Portable” Aspect:** Choosing items that are too heavy or bulky to easily move and store. The goal is to reclaim your space, so make sure it’s genuinely easy to pack away.
Creating an organized portable home office is an empowering act of reclaiming your living space while maintaining your productivity. It requires thoughtful planning, smart choices, and a commitment to a little bit of ongoing maintenance. But the rewards – a clear mind, a tidy home, and the flexibility to work from anywhere in your house – are absolutely worth it.
Conclusion
Embracing an organized portable home office isn’t just about tidiness; it’s about reclaiming your focus and reducing daily friction. Imagine the ease of finding what you need instantly, the calm of a clear workspace, and the productivity boost that comes with it. Even the smallest step, like dedicating five minutes today to clear your desk surface, can be the beginning of a more serene and efficient workday.
If a full portable office isn’t your immediate goal, consider these variations: a kitchen command center for bills and schedules, or a bedside caddy for essential reading and charging. The principles of organization are adaptable! We invite you to explore more ideas on how to bring order and calm to every corner of your home.